
To sign out of Creative Cloud desktop, click your profile icon and choose Sign Out.
Last updated on
For an introduction to adding fonts, see the Add new fonts on your desktop tutorial.
1. Install Creative Cloud desktop
Fonts are added on your computer through Adobe Creative Cloud desktop. If you do not have the software installed, download it here.
2. Launch the Creative Cloud desktop app
Creative Cloud desktop must be running and you have to be signed in to Creative Cloud for the fonts to be added. If the software isn't running or you have signed out of Creative Cloud, the fonts will be unavailable temporarily.
3. Confirm account information
Make sure that you are signed in to Creative Cloud with the same Adobe ID that you use for your Creative Cloud subscription.
Your account information is at the top of Creative Cloud desktop; click your profile icon to reveal the name and email address of the account you're using.
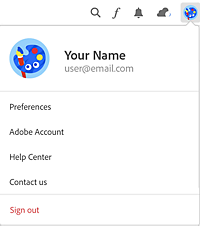
To switch to a different account, click Sign Out. After you are signed out, you will see the option to sign in with another Adobe ID.
You can also click on the “Account” option in the Creative Cloud desktop profile menu to visit your Adobe Account page, and confirm that you are signed in with the Adobe ID that has your Creative Cloud subscription on it.

4. Check if the fonts are successfully added
The Fonts menu is updated when the fonts are added. A red dot will appear next to any font with an installation issue. Hover over the dot for more information about the issue.

Installation error messages
If a font fails to install or there is a conflict with a font already installed on your computer, an error message is displayed with information on how to resolve the problem.
Caution:
If the Fonts menu is a blank white window or shows a loading spinner, refer to Creative Cloud desktop app doesn't open | Progress wheel spins continually for further troubleshooting.
Unable to Install or Uninstall Adobe Fonts in macOS Ventura?
You might face issues adding or deleting your Adobe Fonts if you've turned off the Adobe Creative Cloud login item in your Mac's System Settings. Turning this option off also closes the background processes required for Adobe Fonts services to function. Learn how to enable the Adobe Creative Cloud login item. Once you've turned it back on, you'll be able to use your Adobe Fonts again.
5. Toggle the Adobe Fonts setting
If the fonts are not added, try turning off the font option in Creative Cloud, wait a moment, and then turn it back on.
Open the menu from the gear icon at the top of Creative Cloud desktop. Choose Services, and then toggle Adobe Fonts to turn it off and back on.

6. Sign out of Creative Cloud and restart the computer
Signing out of Creative Cloud and restarting the computer stops any font-related processes that may not be running correctly and starts new ones.
-
-
Quit Creative Cloud desktop.
-
Restart the computer.
-
Start Creative Cloud desktop.
-
Sign back in to Creative Cloud.
7. Windows 10: check the Untrusted Font Blocking setting
Windows 10 has an option to "block untrusted fonts" which, when turned on, also blocks Adobe Fonts from adding.
This article from Microsoft explains how to check whether it's on for your computer:
If block untrusted fonts is on in either the Group Policy or the Registry Editor, it needs to turned off or changed to the "audit" setting for font addition to work.
8. Check for network proxy or firewall issues
If your network proxy or firewall blocks access to any of the required network endpoints, Adobe Fonts will not work. Your computer needs to be able to reach these endpoints and download files from them.
Here is a list of the required domains; port 443 also needs to be open.
https://data.typekit.net:443
https://state.typekit.net:443
https://polka.typekit.com:443
https://api.typekit.com:443
Contacting Support
If these steps don't solve the problem, contact Adobe Customer Care for further help.