Select the content block on the slide.
Last updated on
- Captivate User Guide
- Introduction to Captivate
- Add a slide
- Add text blocks
- Add media blocks
- Interactive components
- Widgets
- Create quizzes
- Add audio to a project
- Interactions
- Animations
- Accessibility
- Customize the timeline
- Customize TOC and Playbar
- Edit project properties
- Preview a project
- Share a project for review
- Publish a project
- Create a simulation project
Learn how to add text to your Adobe Captivate project.
The user interface of Adobe Captivate makes it simple to add and format text. You can add text, edit text, change fonts, and much more to provide you with even more control over text and paragraph layout.
Text content blocks
There are three types of content blocks available in Captivate:
- Paragraph
- Multi-column
- List
On the left panel, select Add text blocks > <text content block>.

Add text
Select Add text blocks > Multi Column Content. This adds a text block containing two text columns on the slide. Each column contains a title and body.
You can also add other types of text blocks- Paragraph and List.
Change the properties of the text content block
-
Select the text content block Select the text content block -
Make the text layout with two or three columns. Move the Number of columns slider to two or three.
-
Select any design option.
-
In the Components section, display or hide the following:
- Title: Select to display or hide the title of the text.
- Subtitle: Select to display or hide the subtitle of the text.
- Body: Select to display or hide the body of the text.
- Button: Select to display or hide the buttons below the text blocks.
- Card: Select to display or hide the card around the text.
Conponents of a text block Conponents of a text block -
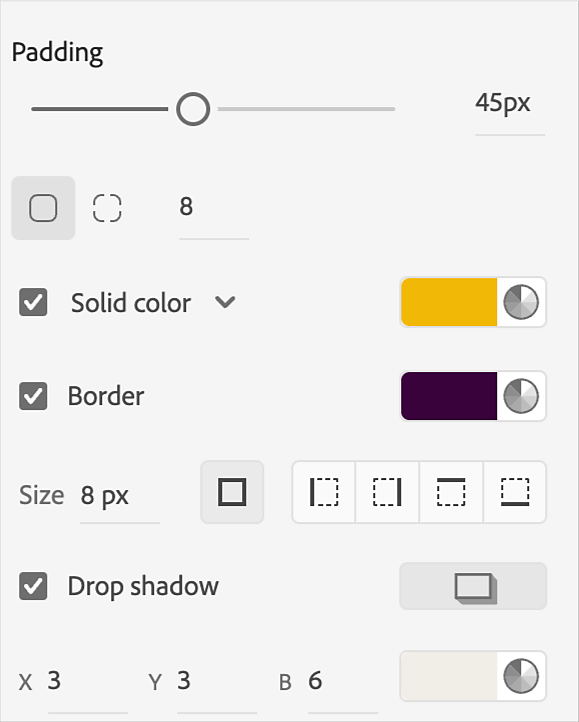
If you've selected Card, you can change the card's properties, such as padding, background color, border, or shadow. For all, except, card, you can also change the alignment to left.
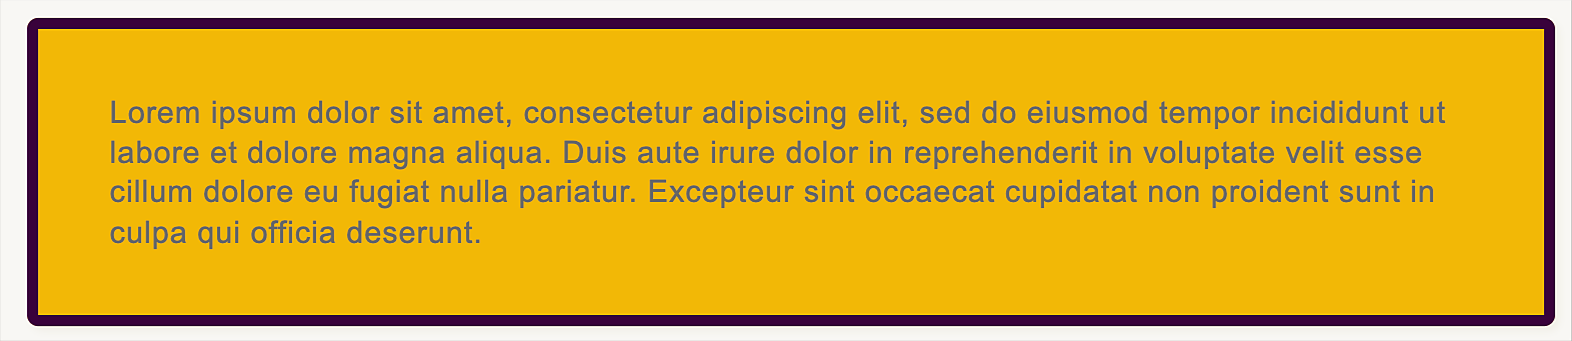
Here's how a text content block looks when you add a card.


Format text
-
Select any text, for example, the title. The Property Panel shows all the properties that you can apply to the text.
Text formatting options Text formatting options -
In the Appearance section, apply a preset. A preset is a preconfigured setting or template that allows you to apply a predefined set of styles or effects to achieve a specific result. Presets are commonly used in editing by providing ready-made options that can be easily applied to achieve desired outcomes.
In the list of presets, select any preset. The preset you'll select gets applied to the selected text.
-
Change the text font, size, and style. Adjust the spacing of a character in the text, paragraph, or line.
Edit fonts and adjust spacing Edit fonts and adjust spacing Note:If you open any project on another machine that doesn't contain the font you had used, the font falls back to Arial (regular).
-
Add color to the text. From the color picker, select any color. You can also add an outline to the text, add shadow, or apply highlights.
-
Select the Bullets and numbering to add bullets if you want to add a list as text.
-
If you want to insert a link to the text, then expand the section Link, and have a selected portion of text redirected to a web page or an email address.
Select Open in new window to open the URL in a new browser window.

